Showing posts with label card. Show all posts

Tuesday, 27 January 2015

Two pages and a card for Lemoncraft


Hello again. 
I am so glad to be back to share some projects with you.

First I have two pages that I made in the mixed media style. 
I used the 'Forget Me Not' collection and the 'Just Love Me' collection as well.

Here is the mainly 'blue' page I made:


I used some dies to make the round shapes and added some fussy cut elements from the A4 sheets.


I also made a page in mostly pink tones:


I used a stencil and a mix of mists and paints here. The title is 'Technical Cousins and you can see they are all playing with their phones and electrical games, even at a young age :-)


Finally I have a card that I made for the Sizzix blog using beautiful Lemoncraft products from the 'House of Roses' collection.


Thank you for looking!
Bente


Monday, 5 January 2015

'Thanks' for Sizzix Sunday!

Hi all my blog friends!!

 This Sunday I have a sweet little something to share with you on the Szzix UK blog.
Here is a close up of my project:


Click HERE for the full reveal.

I used:

Sunday, 9 November 2014

Step-up card for Sizzix Sunday post.

Hi and welcome to my blog today!!

As it's Sunday I have prepared a little Sizzix something for you and here's a little peak 
of what I made:


Press the link HERE to see the full reveal!!

Have a lovely Sunday!


Saturday, 13 September 2014

A page and a card using gorgeous Lemoncraft.

Hello friends!!
I admit I've been a lazy blogger lately..., but hey, ...I am back to share a couple of  
things made with beautiful Lemoncraft products.
Today I have one of the pages to share and a little card that I made a while ago.

First up is my page using the lovely 'Forget Me Not' collection and looks like this:

 I wanted the look to be a little bit different so I decided to use one of my dies 
and cut out a round shape from my normal sized photo. 
I used one of the doilies from a paper in the 'Just Love Me' collection as a frame. 
These two beauties are my eldest daughters :-) The trellis pattern was made with one of my fave Sizzix dies HERE.

To make the pretty and feminine colours of this collection shine 
I added some solid chartreuse cardstock that I think fits in very well.


I used one of my new dies from Sizzix HERE to make the sweet little foilage for my flowers.
And just to  make sure this post does not go on forever I made a collage with a few more close ups :-)

 I fussy cut the large rose design from the A4 Retro decorations sheet. 
I made it a special feature here and think it is such a beautiful detail.


And finally a photo of the card that I made a little while ago, 
but thought I could share it here as well:)
 
 
 To see close ups of the products I used for my pages please visit the Lemoncraft blog and my post there :-)

Thanks for visiting! Hugs!

Sunday, 20 July 2014

My project with the new Sizzix/Prima butterfly dies

Sorry to have been missing in action lately. I have been away on a proper little 'adventure'. 
I spent almost four days over in delightful Wales visiting with my new fiends at Sizzix Europe. 
I will tell you a little more about that visit in a day or two but first I want to share what 
I made for my previous post on the Sizzix UK blog.


Please follow the link underneath the picture to see this weeks full reveal.
I would love a comment from you over there! :-D


I used Prima 'Tea Thyme' and 'Delight' collections and I hope you like it.

Hugs!


Wednesday, 19 March 2014

Guesting at Norwegian 'Vintage Utfordring

This week I am guesting the Norwegian challenge blog 'Vintage utfordring' with a card in vintage style 
using Inkido products. 

I used mainly the Beautiful Memories collections for thiss card.
And also a couple of Inkido mini roses.

I utfordring # 77 vil vi se  
Søm, falsk eller ekte, i vintagestil.

Du har fram til den 28 mars 2014 kl 22.00 CET
til å laste opp dine bidrag via inlinkz linken nederst i posten. Har du ikke blogg så kan du gjerne levere dine bidrag via mail til vintageudfordring@hotmail.com. Husk å merke mailen med 'Bidrag til utfordring #77.
Challenge 77 is to use stitches, any kind, real or false on your project.
What you make must be in vintage style.

Deadline: March 28th 2014, 22.00 CET


Papercraft Scandinavia is sponsoring this latest challenge
and below is a picture of the new collection that one lucky winner will receive!!


And there is also a prize from The Ribbon Girl.


I hope you will join in this fun chalenge!
You can read about the it here and also see the reveal.


Tuesday, 11 March 2014

Birthday card for a friend, (Papirdesign).

Hei, i dag vil jeg vise ett lite bursdagskort jag har laget til en venn.
Jeg har klödd litt i fingrene etter å lage med de nye arkene, og har fått gjort en hel del siden de kom , men to av layoutene er fremdeles litt 'hemlige' siden de skal väre med i ett online magasin den 1 april.
Her er iallefall kortet mitt:

Hi there! Today I want to share a card made with the latest collection 'Forventning' (means 'Anticipation') from Papirdesign. I have actually made a couple of pages, but cannot share as they will be in my fave online magazine on April 1st. But without further ado; here's my card that I made for a friend:

 Og her kommer ett lite närbilde:

And a closeup:


 Ennu en gang har jeg kunnet nyte av alle de fine Papirdesign blomstene for mitt prosjekt!

Once again I enjoyed working with loads of gorgeous Papirdesign flowers!

Forventning: Gratulerer, rosa
Forcventning: Jacob og Jenny
Geranium rosa pakke, 
Chipboard, jente
Grönne blad, 


Miniroser

Thanks for dropping by!!

Tuesday, 23 July 2013

Projects I did for the Summer issue of PaperHaus Magazine.

I have a lo and a card to share with you that I made for the PaperHaus Magazine, Summer Issue. 
It was made as an example for the PaperHues section.
I'll admit I actually found the colours quite hard to combine. At first I made a pure mixed media layout but didn't like the way it turned out. You could say it was 'too much mix and not enough media'. I tore it to shreds and was honestly a bit worried I would miss the deadline with just a day or so to go.... But I managed.... :-)


And here are a few close ups:


 And I had a card in the CardHaus section prepared after the latest sketch:


I am just  a couple of weeks from the deadline for the next PaperHaus magazine which will be in celebration of our first birthday! I am certainly going to be busy this coming week!

Hugs!!


Sunday, 19 May 2013

Card and tutorial for DT at Papirdesign.

Hi hei idag vil jeg vise et enkelt kort jeg har laget. Av og til kan det väre bra Ã¥ fÃ¥ ideer om hvordan man kan lage saker ganske fort og enkelt i siste stund. Jeg vet at det er sÃ¥nn for meg iallefall. En söt liten pynteting kan väre en liten 'vindmölle' av papir 

Hi  today I am here to share a card  and a simple tutorial on how to make a pinwheel. Those  pinwheels make such a cute design element on cards and layouts.

SÃ¥nn ble bursdagskortet jeg laget for Papirdesign :
This is how my card for Papirdesign turned out: 


Her kommer beskrivningen på 'snurrehjulet'. Jeg har laget det i punktform 1-4:

I wrote the instructions in a few easy to follow steps:


1. Begynn med et stykke papir som er kvadratformet. 
Velg gjerne ett det fram og baksiden passer fint samman siden du vil se begge.

1. Start with a square piece of paper. Good idea to choose one that has matching 
front and back as you will see both sides.

2. Klipp etter markeringene ca 2/3 deler inn mot midten.
Den lille snurren' pÃ¥ kortet er 6X6 cm. 

2. Cut along the lines about 2/3ds towards the center.
The small pinwheel for a card-topper is 6X6 cm.

3 og 4. En etter en folder du inn hjörnene mot midten. 
Du kan lime dem fast eller lage et lite hull og feste med en brad.

3 and 4. Fold the corners towards the middle one by one. 
You can glue them down or make a small hole and secure with a brad. 

Etter at du har gjort disse momentene kan du pynte  'snurren' med en blomst ,som jeg gjorde
 pÃ¥ kortet eller hvorfor ikke en knapp i matchende farge...?

When you have completed these easy steps you can add a paper rose on top of your 
embellishment like I did for my card. Or why not use a matching button...?

Lager du den litt större er den fin å bruke som pynt til barneselskap.
Jeg brukte et papir pÃ¥ 15X15 for  störrelsen jeg holder i handen.

The pinwheels make cute decorations for birthday-parties. 
You can easily adapt the size to your need.
The one in my hand was made using a paper size 15X15 cm.


Jeg har brukt  / I used :

Lykke-Blå pioner
Blue paper roses
Blue ribbons/lace

Det var allt for idag!

That's all from me today!!

Klem / Hugs


Sunday, 10 March 2013

Winner of my RAK for the Spring Fling hop and a card for baptism.

Hi! Just a quick post today with a card I made for a baptism of a beautiful baby girl last Saturday.
I wanted to have a handmande card, and was able to make one really quick one using some of my scraps and a few embellies. I used the collection 'Beautiful Memories ' from Inkido which has quite a few designs that are perfect for these occations. The baby-image was cut from one of the sheets that has so many of these similar designs. Really quite a perfect supply to have at home if you have many babies 'near you'.


This card is up on the Inkido blog today together with a layout that I shared a few days ago as my contribution to the Scrap 4 Help challenge for March

Scroll down to the previous post if you would like to see more close ups of this one .-)

We also have a challenge at the Inkido blog right now, hosted by Kelly.

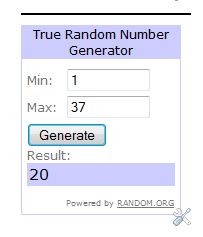
Now to the announcement you have been waiting for.... Ta daaa...
My winner is:

My commenter number 20 is

Pam: Love your LO ! The stitching is awesome.

(Please get in touch with me with your address within a week.)

Hugs, Bente!!


Wednesday, 23 January 2013

A card for the new combo at Pandore

As always around the 20th of the month there is a new colour combo at Les Papiers de Pandore.
This time I decided to make a quick card.


And here is the inspiration photo with the colours:


Most of my elements here are die cut from Pandore papers or cut from the patterns like the butterfly.


All the patterned papers have different strips at the bottom and I used one of those to make my paper ribbon. I think that music-notes pattern is so cute. 


I simply formed the strip into a ribbon shape and stapled in place before glueing it to the brown circle.


I am off to do some more work now. I am having some difficulty getting around to as many of your blogs and commenting as I would like as I am having some internet-trouble again....
Mostly surfing on the IPad works but commenting does not work very well!!
Hoefully I will soon find a way to fix it and I'll be back!
Hugs!
Related Posts Plugin for WordPress, Blogger...